How to put a graphics card in a pc experience by enhancing visuals, increasing resolution, and supporting advanced graphics technologies. For beginners, replacing or upgrading a graphics card may seem daunting, but with the right guidance, it’s a straightforward process. This beginner’s guide will walk you through the essential steps of how to put a graphics card in a pc, ensuring that you do it safely and correctly to get your system up and running without a hitch.
Pre-installation Preparations
Understanding Compatibility and Requirements
Before how to put a graphics card in a pc, verify that it’s compatible with your motherboard and that your power supply unit (PSU) meets the card’s power requirements. Measure the available space inside your case to ensure the card will fit. Keep in mind that some GPUs require specific connectors that your PSU should have available.
Gathering Necessary Tools and Safety Precautions
You’ll need a screwdriver for the installation, and it’s crucial to ground yourself to prevent static electricity damage to PC components. You can do this by touching a grounded metal object or by wearing an anti-static wrist strap. Also, ensure the PC is unplugged, and work on a clean, static-free surface.
Removing the Old Graphics Card
Accessing the Existing GPU
Open your PC case by removing or unscrewing the side panel. Locate the existing graphics card. It’s typically found in the PCIe slot closest to the CPU, held in place by screws on the case’s backplate and possibly with a clip at the end of the PCIe slot.
Safely Extracting the Card from the Slot
Before yanking out the old card, unplug any power connectors, then carefully unscrew it from the case’s backplate, ensuring you preserve the screws for the new card’s installation. Depress the PCIe slot clip to unlock the card, then gently pull the card out with equal force on both ends to avoid damaging the PCIe slot or the card.
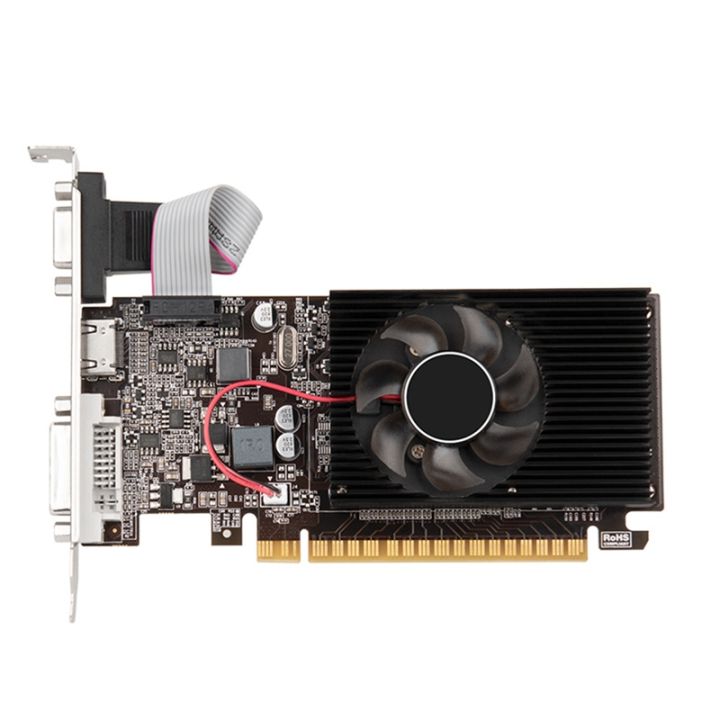
Installing the New Graphics Card
Preparing for the New GPU Installation
Remove the new graphics card from its packaging, handling it by the edges to avoid touching any circuitry. If the new GPU requires two backplate slots, remove the necessary covers from the case. Check that the PCIe slot is clear of obstructions and ready for the new card.
Seating the Card into the PCIe Slot
Align the new GPU with the PCIe slot, ensuring the ports face the back panel of your case. Apply even, gentle pressure on the top of the card until it clicks into place, indicating it’s properly seated. The PCIe slot clip will snap into the locked position when the card is correctly inserted.
Powering the Graphics Card
Connecting the PSU Cables
If your new graphics card requires additional power, locate the appropriate 6-pin or 8-pin power connectors from your PSU. Connect these to the power ports on your graphics card. Make sure the connectors snap into place; a loose connection can cause your card not to function properly.
Organizing Cables for Optimal Airflow
Once connected, manage your power cables by routing them to avoid blocking airflow inside the case. Good cable management is crucial for maintaining a cool environment and ensuring that your new GPU operates efficiently and effectively.
Final Steps and Testing
Securing the GPU and Closing the Case
With the new card seated and powered, secure it to the case’s backplate using the screws you set aside earlier. Once secured, replace the side panel of your case and reconnect any peripherals or power cables that were disconnected.
Booting Up and Installing Drivers
Turn on your PC and monitor the initial boot-up. If everything is connected correctly, the system should recognize the new GPU. Install the latest drivers from the manufacturer’s website to enable all of the card’s features and ensure optimal performance. Some graphics card drivers include software for tweaking performance and monitoring GPU statistics.
Setting up the Workspace
Clearing the Area
To start, clear a large, flat workspace to prevent any clutter or unnecessary items from interfering with the installation process. Make sure you have enough light to see all the components and connections clearly.
Arranging Tools and Components
Lay out your tools and the new graphics card in your cleared workspace. Keep them within easy reach but not so close that they could get in the way or accidentally cause static discharge on sensitive parts. The fewer movements you have to make during installation, the lower the risk to your components.
Prioritizing Safety
Safeguarding Against Electrostatic Discharge (ESD)
Before touching any internal hardware, it’s vital to protect them against electrostatic discharge, which can damage electronics. Ground yourself before beginning by touching a metal part of your computer case or using an anti-static wristband. This step is essential to avoid potentially ruining your new graphics card or other internal PC components.
Handling Components Correctly
During the installation process, handle your graphics card and internal PC parts by their edges, avoiding contact with chips, circuitry, or connectors. This practice not only prevents ESD damage but also prevents oils from your skin from forming corrosive spots on metal contacts and leads.
Post-Installation Checks
Inspecting Installation Quality
After inserting the new graphics card and securing it, take a moment to double-check your work. Ensure that your new GPU is firmly seated in the PCIe slot, that the power connectors are fully inserted, and that any locking latches are engaged. Confirm that no cables obstruct fans or other moving parts in your case.
Keeping the Internal Environment Clean
With the card successfully installed, give your PC case one last check for any debris, tools, or loose screws that may have fallen in during the installation process. A clean interior will help your PC and new graphics card run smoothly and reduce the risk of overheating or short circuits.
Final Recommendations
Keeping Documentation
Retain all packaging and documentation that came with your new graphics card. Manuals, warranty information, and driver CDs, should you need them, must be accessible for future reference. Having this documentation on hand will be helpful for troubleshooting or if you need to make a warranty claim.
Continuous Monitoring
After installing the new graphics card and updating its drivers, monitor its performance regularly. Keep an eye on temperatures, fan speeds, and system stability, especially during intensive tasks like gaming or video rendering. Use software utilities provided by the graphics card manufacturer or third-party applications to track key performance metrics. Regular monitoring is crucial to catch potential issues early and maintain your PC’s health.
Upgrading your PC with a new graphics card can be an invigorating experience, boosting your system’s graphical prowess for gaming, video editing, and more. By following the steps outlined in this guide — understanding compatibility, safely removing the old card, precisely installing the new one, connecting the power, and booting up to install drivers — you’ll have your PC up and running with its new graphics capabilities in no time. This beginner-friendly process is one of the most satisfying hardware upgrades you can perform, as the visual rewards are immediately apparent. Get ready to enjoy a whole new level of computing performance.